Gateway Configuration
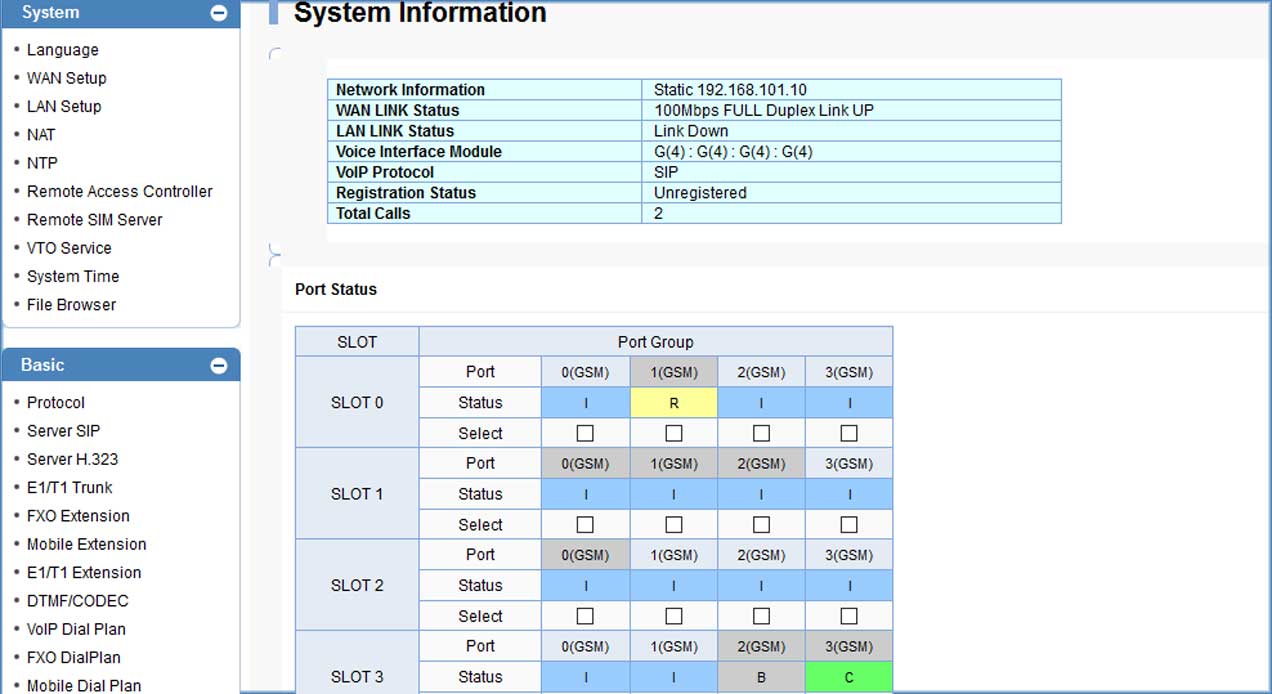
Figure-1: Addpack System Information
Step 1: First page of the Addpack Gateway Configuration we can see the various properties available. Most important attributes are up Port status, call connected status, codec, call duration etc.
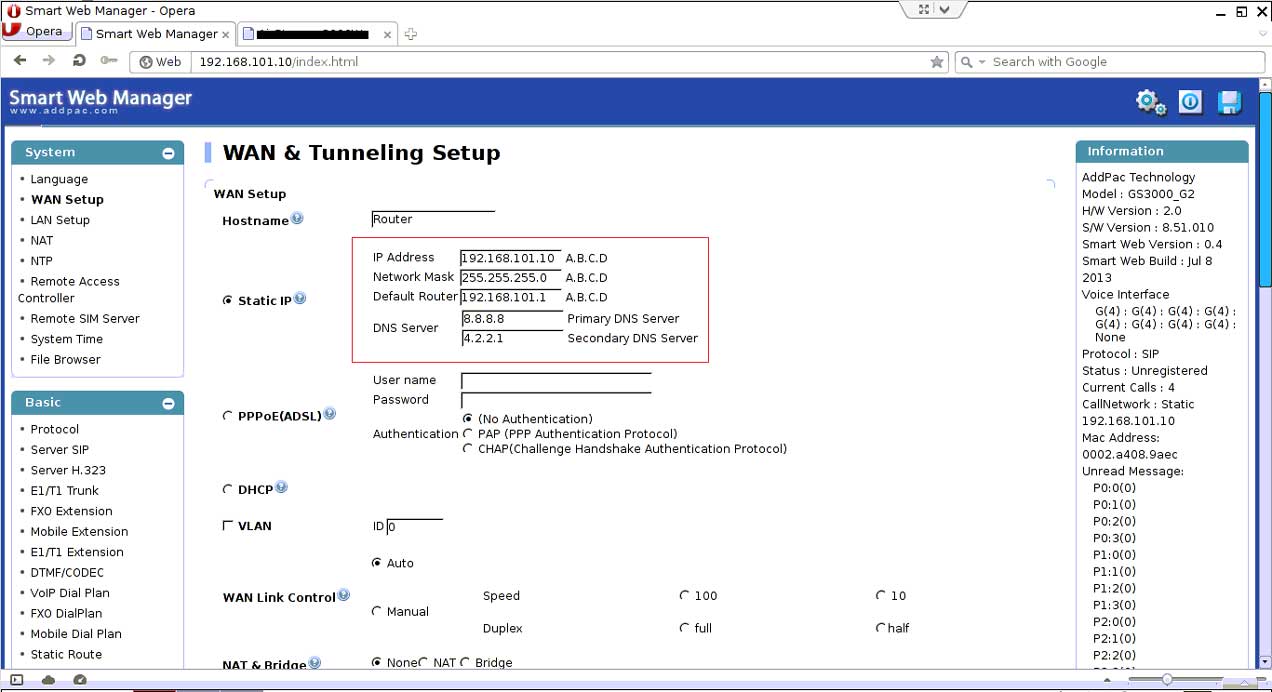
Figure-2: Addpack Gateway WAN setup
Step 2: In Addpack Gateway need to configure the wan settings. For configuring Addpack we must know the default IP (192.168.101.1), subnet mask (255.255.255.0) of the bandwidth optimize solution and need to put the static IP of that gateway.
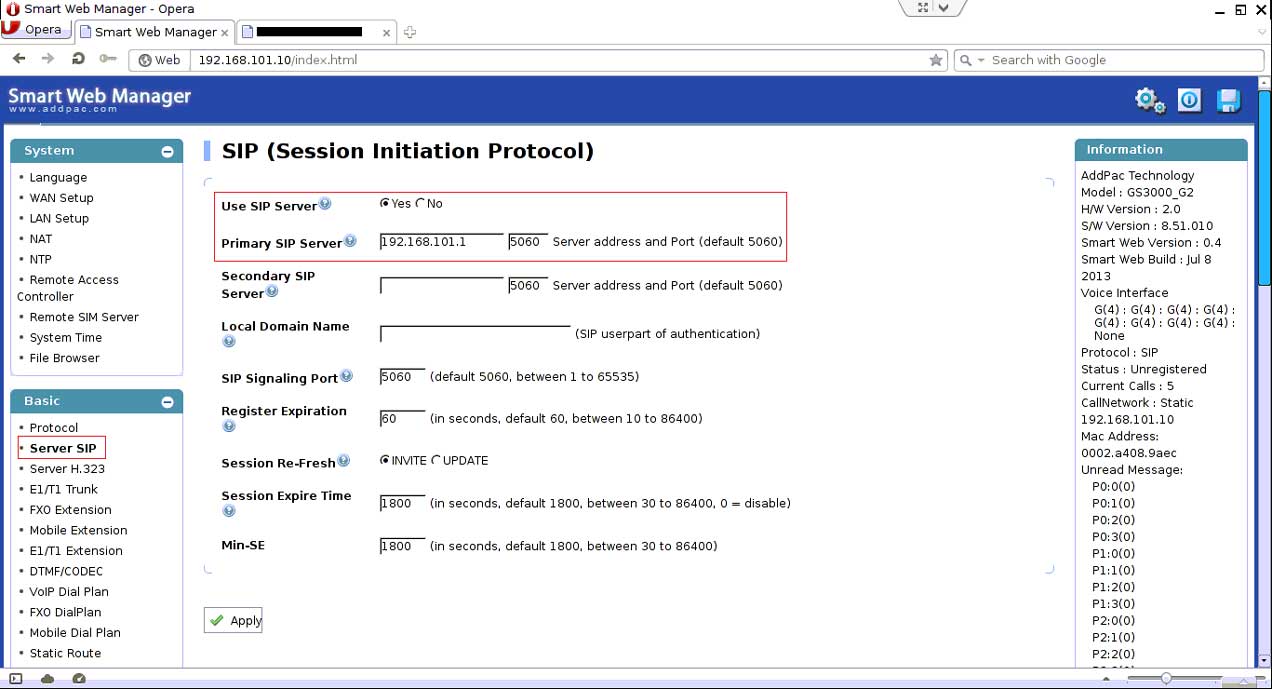
Figure-3: Addpack Gateway SIP Protocol Configuration
Step 3: Addpack gateway sip server IP address will be the default IP of the bandwidth optimize solution for pairing with it.
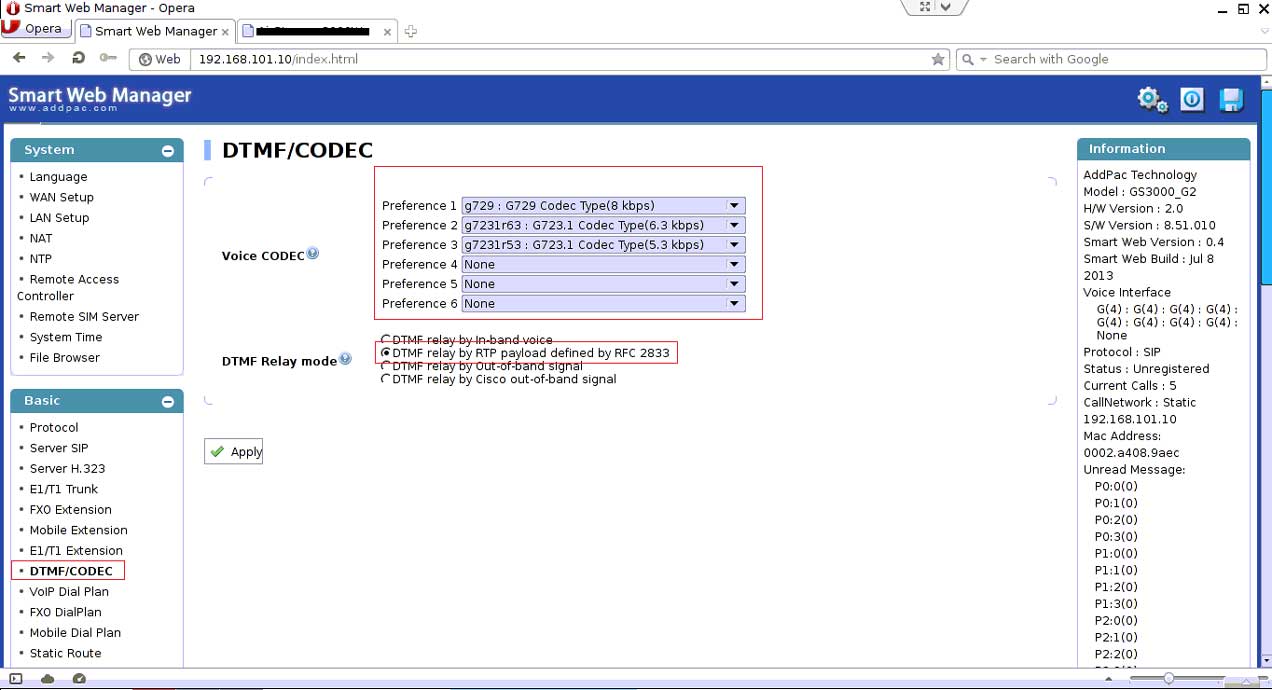
Figure-4: Addpack Gateway Codec Configuration
Step 4: Addpack gateway supports all types of codec like G729/G723/alaw/ulaw. One can set its priority at his will. Relay mode will be ticked at DTMF relay by RTP payload defined by RFC 2823
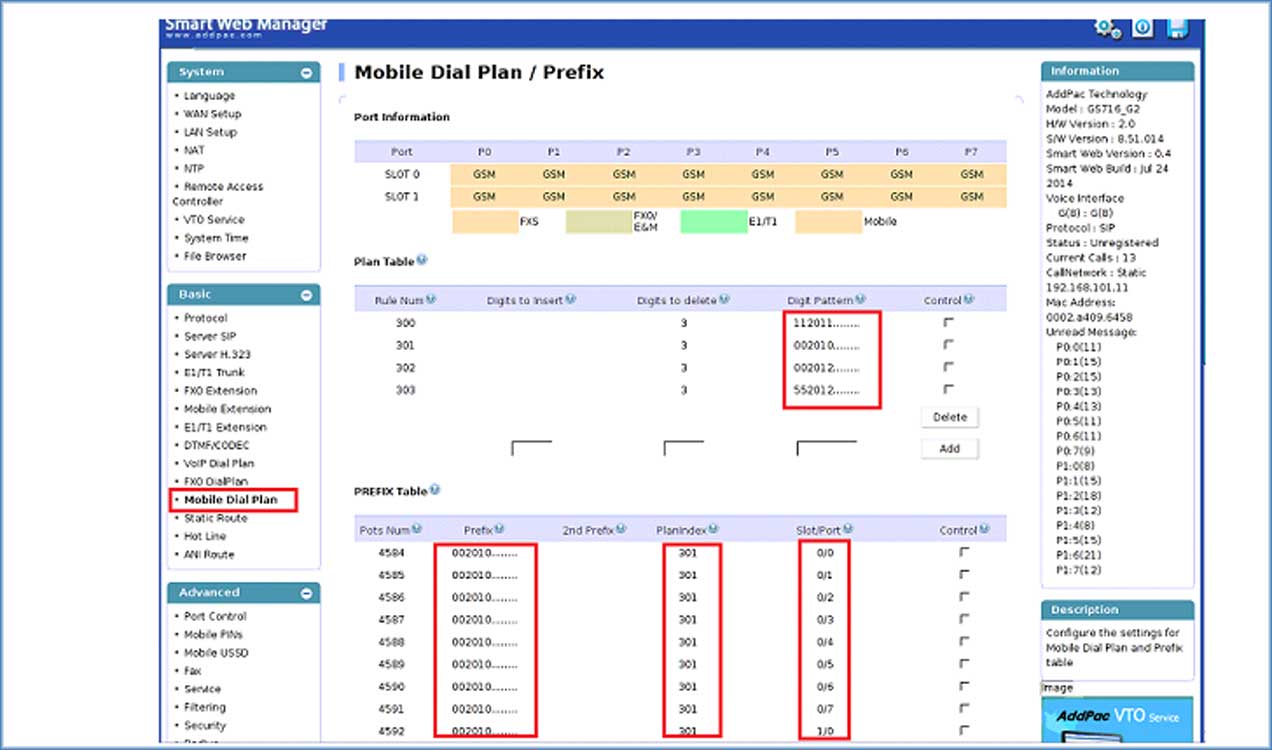
Figure-5: Addpack Gateway Mobile Dial Plan
Step 5: Addpack gateway Mobile configuration is an important option. Here are more things have to configured well. One must add his digits pattern means in which prefix calls will be hit at the gateway. On other part he has to select the plane index and slot/port where Sims are available
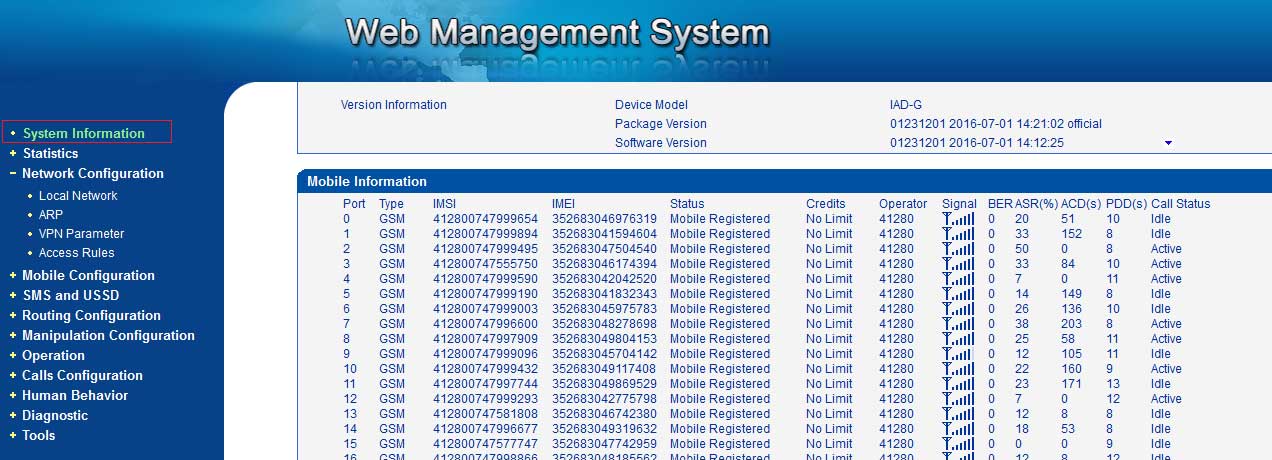
Figure-1: Dinstar System Information
Step 1: After Login to Dinstar VoIP Gateway we see the System configuration page. Here Sim Status, Sim signal, Call status, ASR and ACD of sim is available
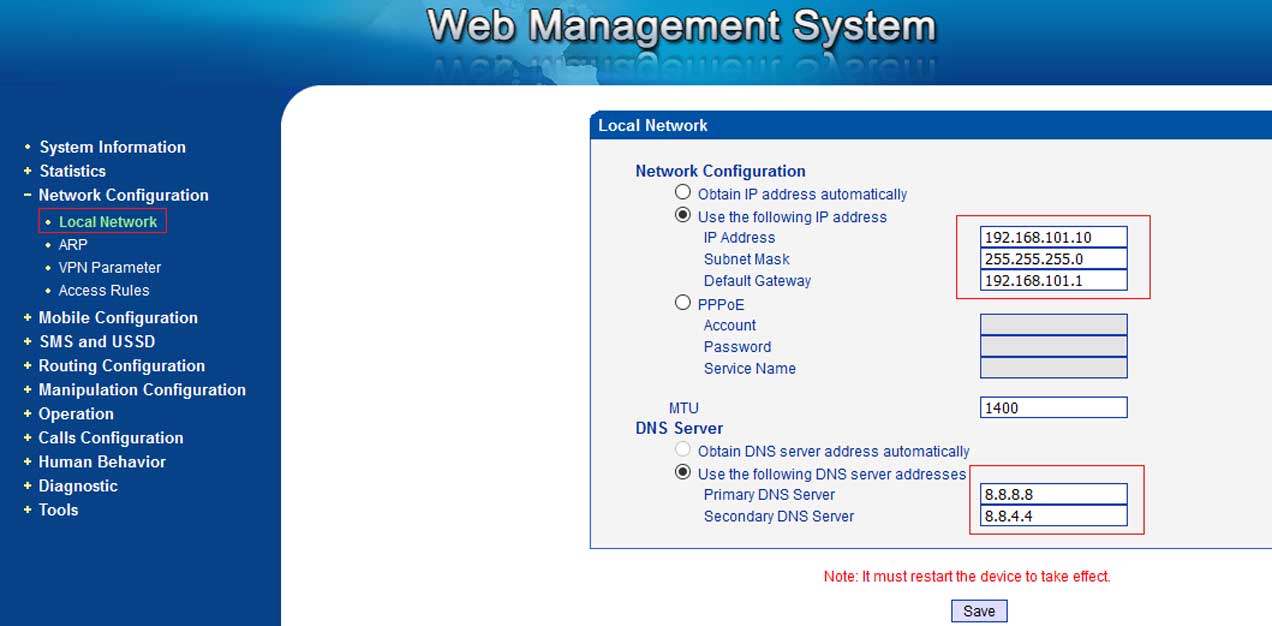
Figure-2: Dinstar Local Network Configuration
Step 2: To configure Dinstar gateway one must know the default IP (192.168.101.1), Subnet Mask (255.255.255.0) of Bandwidth Optimizer solution
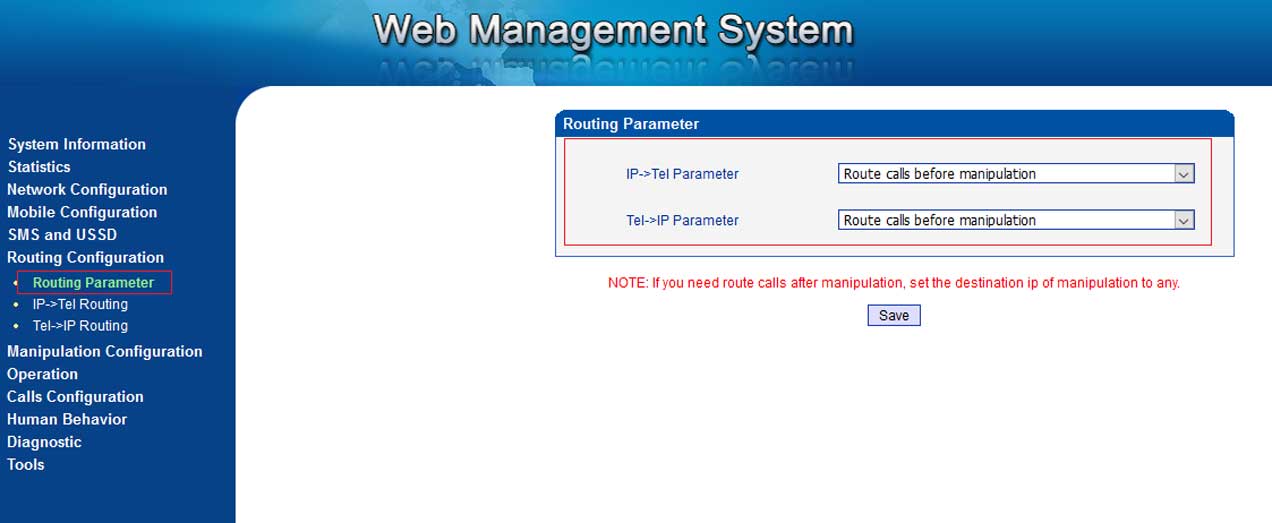
Figure-3: Routing Configuration
Step 3: Routing parameter under the Routing Configuration is a substantial option.
IP-> Tel parameter and Tel-> IP parameter will be set as (Router calls before manipulation)
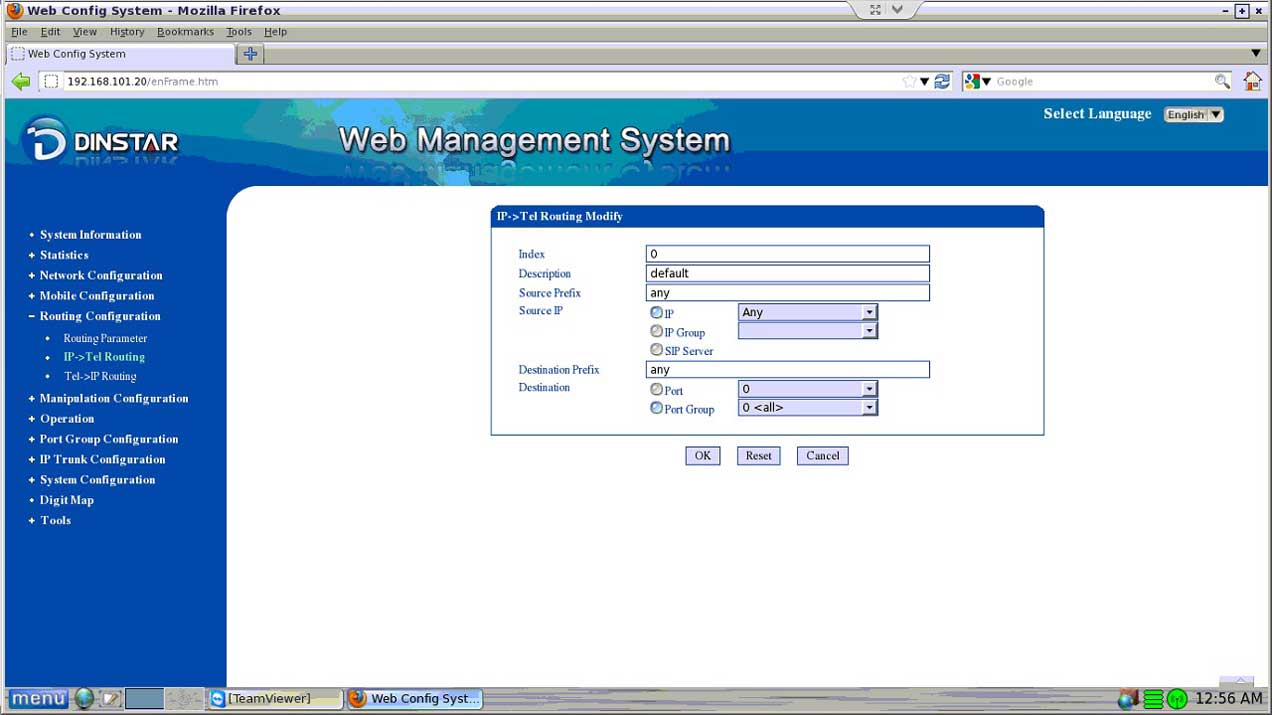
Figure-4: Routing Configuration (IP-> Tel Routing)
Step 4: Ip -> Tel Routing should be set at Routing Configuration. Above configuration is the most suitable for routing

Figure-5: Dinstar Manipulation Configuration
Step 5: Dinstar Manipulation Configuration (Ip->Tel Destination) is done for IP and Port mapping.
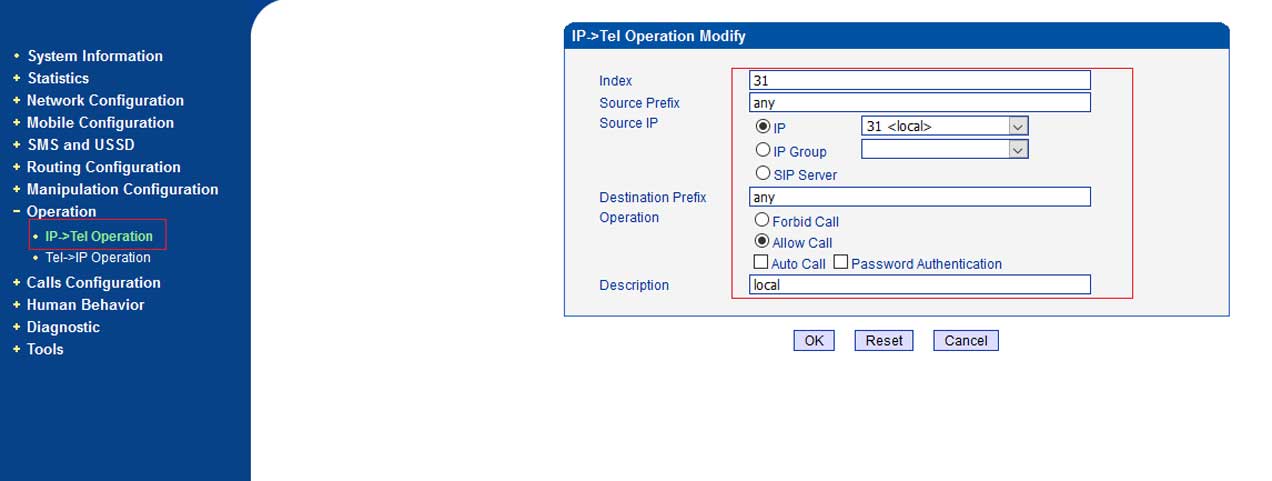
Figure-6: Dinstar Operation Configuration
Step 6: Operation Configuration is used for allowing calls to from Bandwidth optimizer solution to the Dinstar Gateway
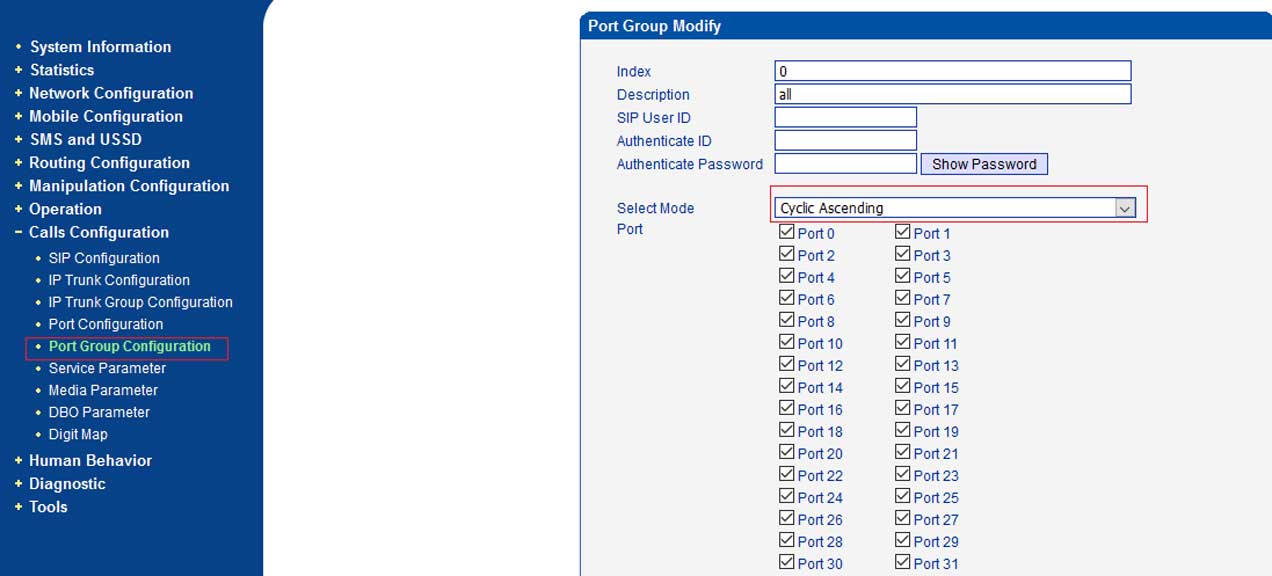
Figure-7: Port Group Configuration
Step 7: Port group Configuration is used for making enable and disable the port . Mode should be “Cyclic Ascending”
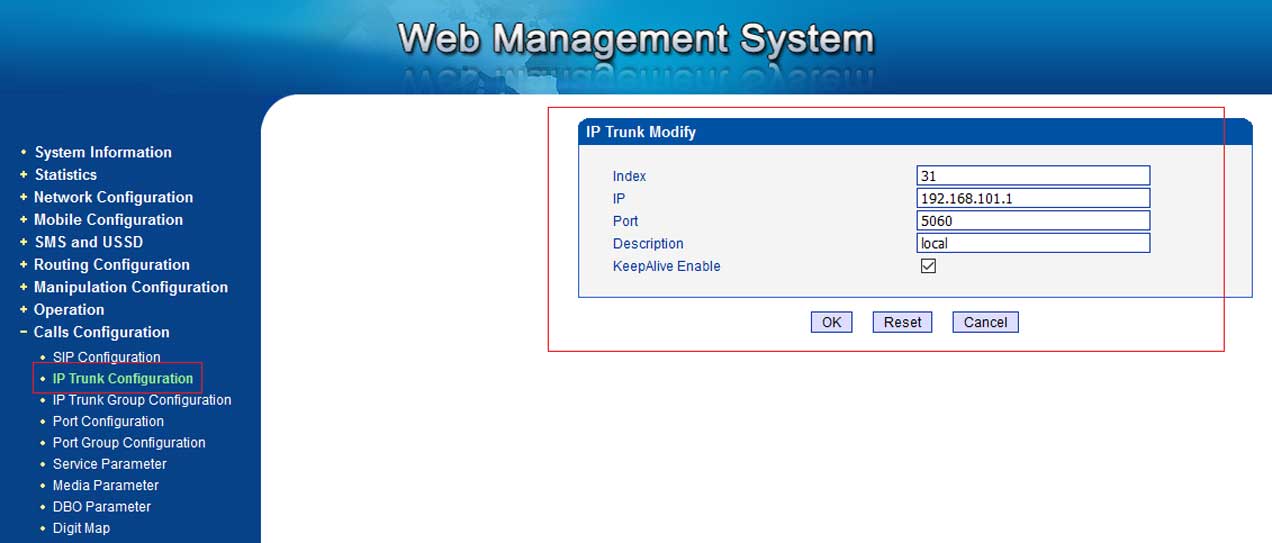
Figure-8: IP Trunk Configuration
Step 8: IP Trunk Configuration in Dinstar gateway is the part and parcel to chose default gateway IP relating to bandwidth optimaize solution. 5060 port should be given.
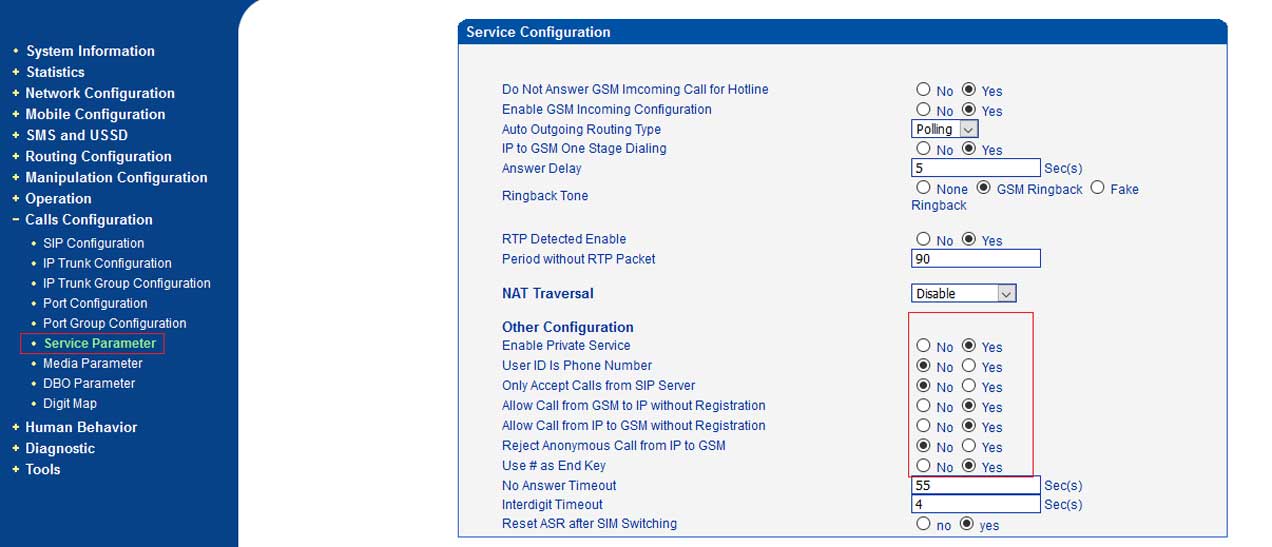
Figure-9: Dinstar Service Parameter Configuration
Step 9: Dinstar Service Parameter Configuration is used for mentioning Codec g729/g723/alaw/ulaw. r and Tel-> IP parameter will be set as (Router calls before manipulation)

Figure-10: Dinstar Sip Parameter Configuration
Step 10: Dinstar Sip Configuration is used for pairing with default sip server IP.
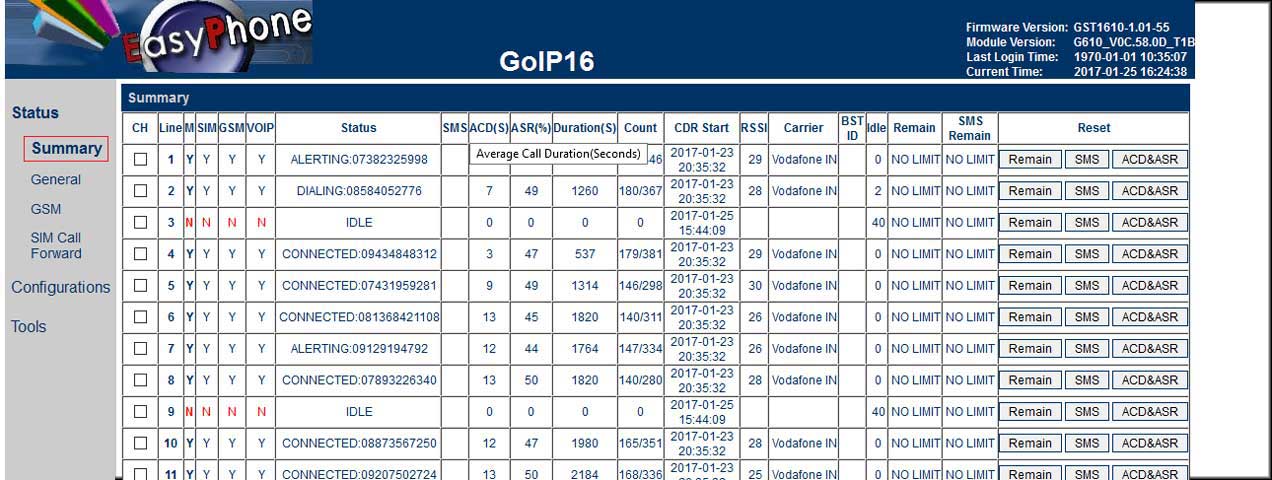
Figure-1: GOIP Summery
Step 1: Above picture is about GOIP 32 VoIP gateway summery. You can find here your call status, sim signal (RSSI), Acd and ASR
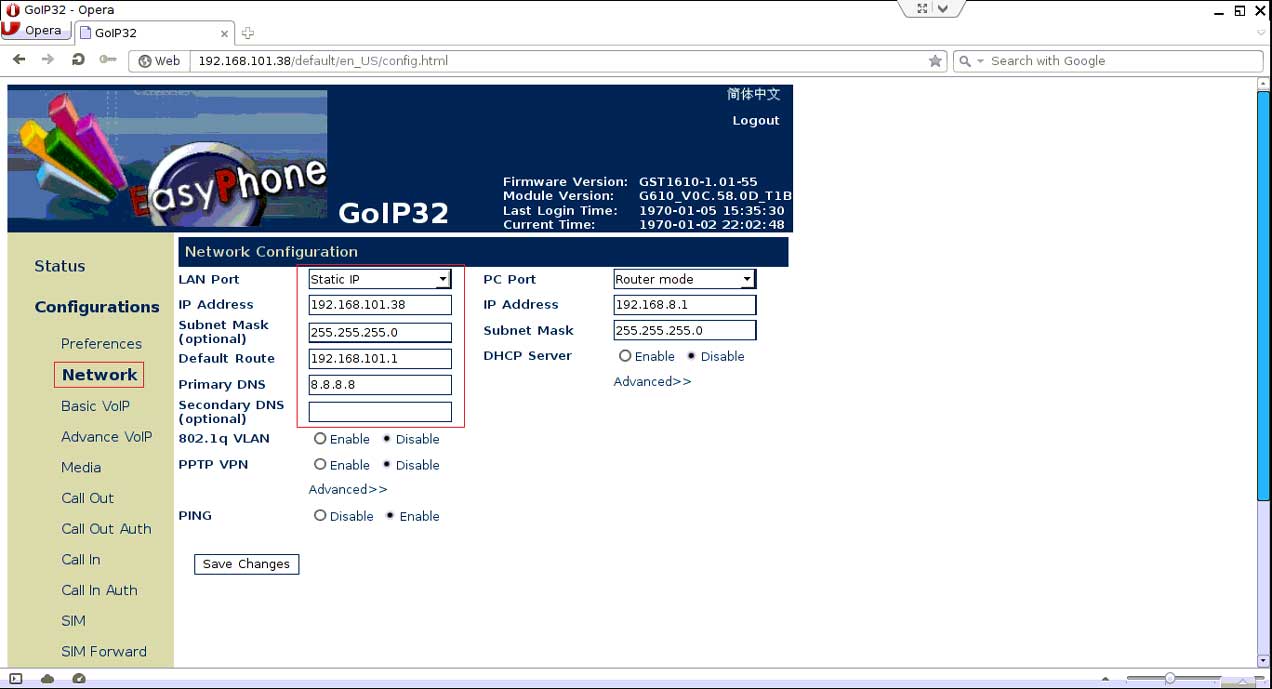
Figure-2: GOIP Network Configuration
Step 2: For GOIP gateway configuration must know the default IP, Subnet Mask of your Bandwidth Optimizer solution and most importantly provide the static IP address
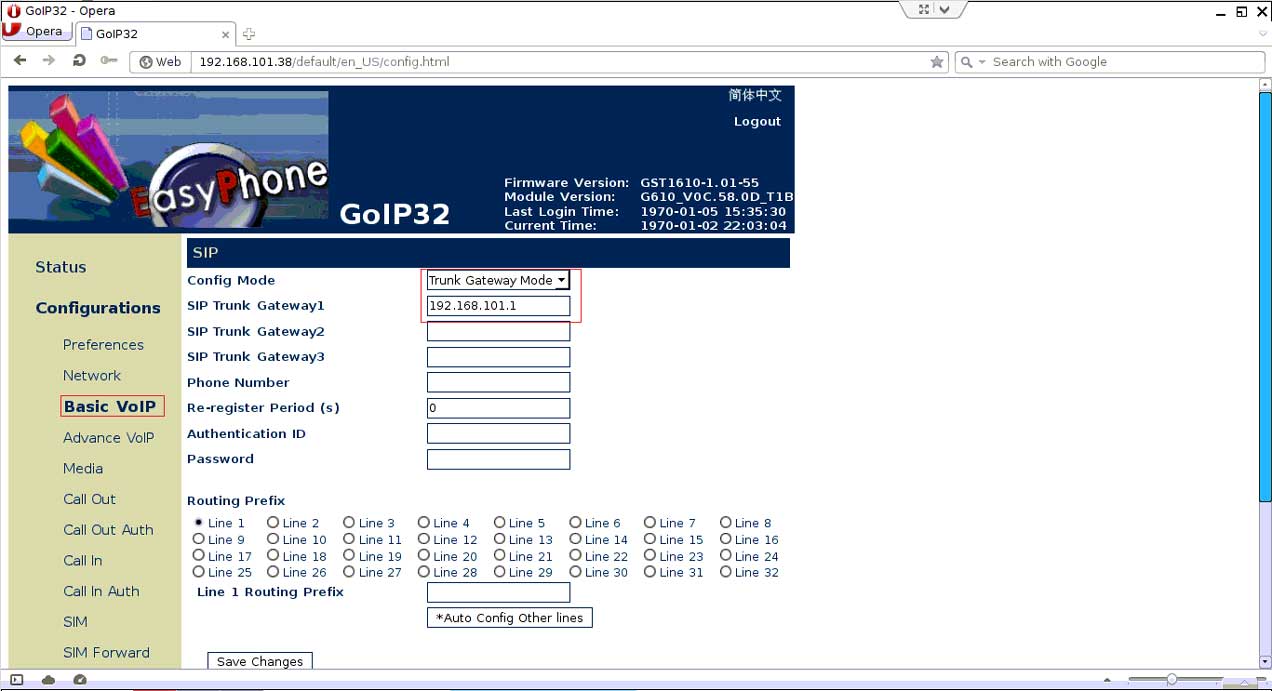
Figure-3: GOIP Basic VoIP Configuration
Step 3: In GOIP gateway have to configure Basic VoIP setting. Configure mode will be Trunk and Trunk IP will be the default IP of Bandwidth Optimize solution.
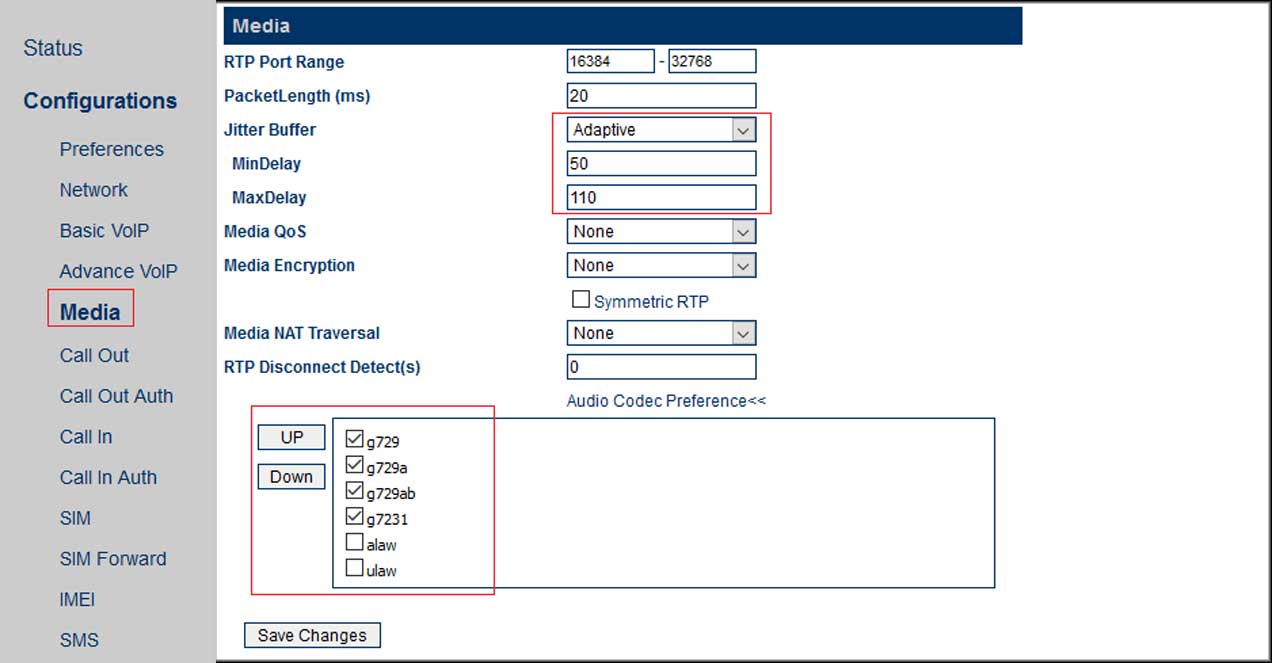
Figure-4: GOIP Media and Codec Configuration
Step 4: GOIP gateway has to be configured with its allowable codec g729/g729a/g729ab/g723/alaw/ulaw. Media has to be selected with Jitter Buffer (adaptive), mindelay (50) maxdelay (110) for avoiding noise.
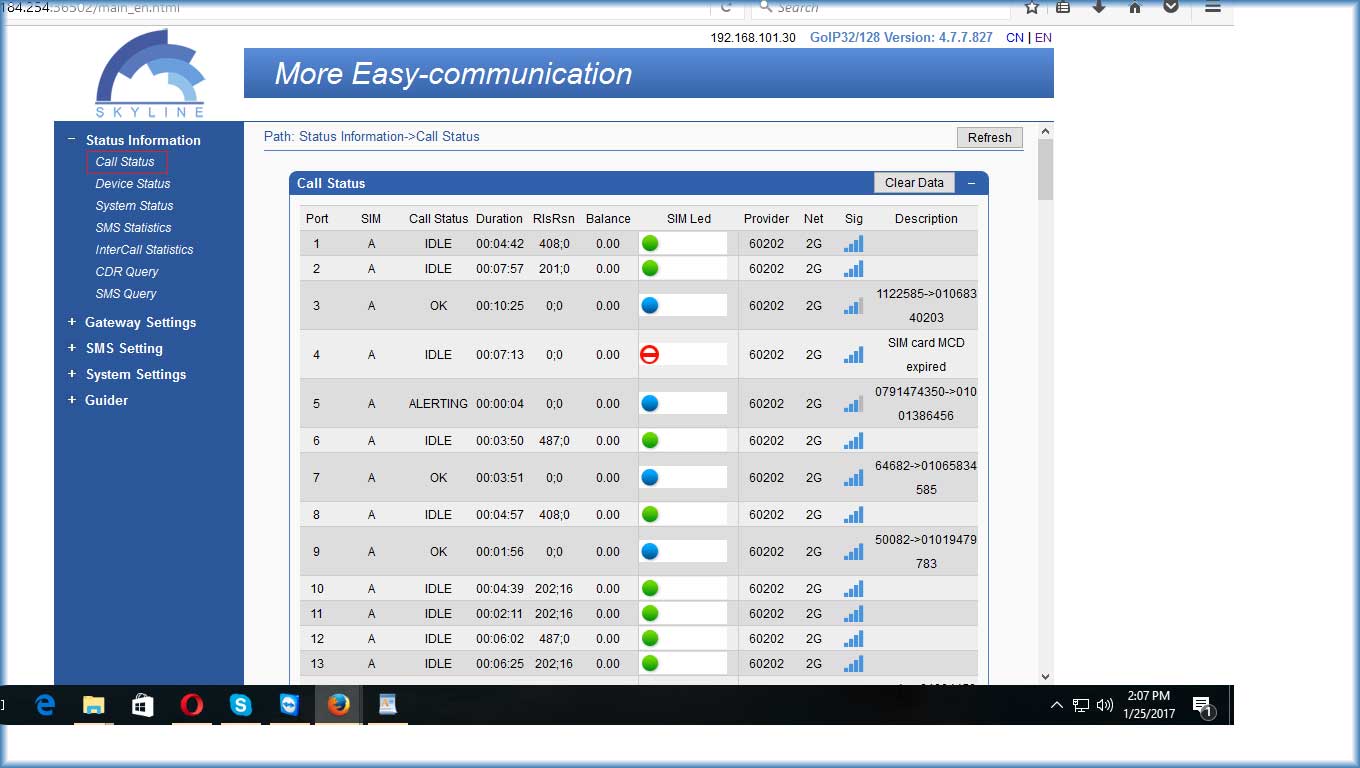
Figure-1: Skyline Gateway Call Status Page
Step 1: Here in First page of skyline gateway can see the call status, sim status, sim signal Strength, sim led port status etc
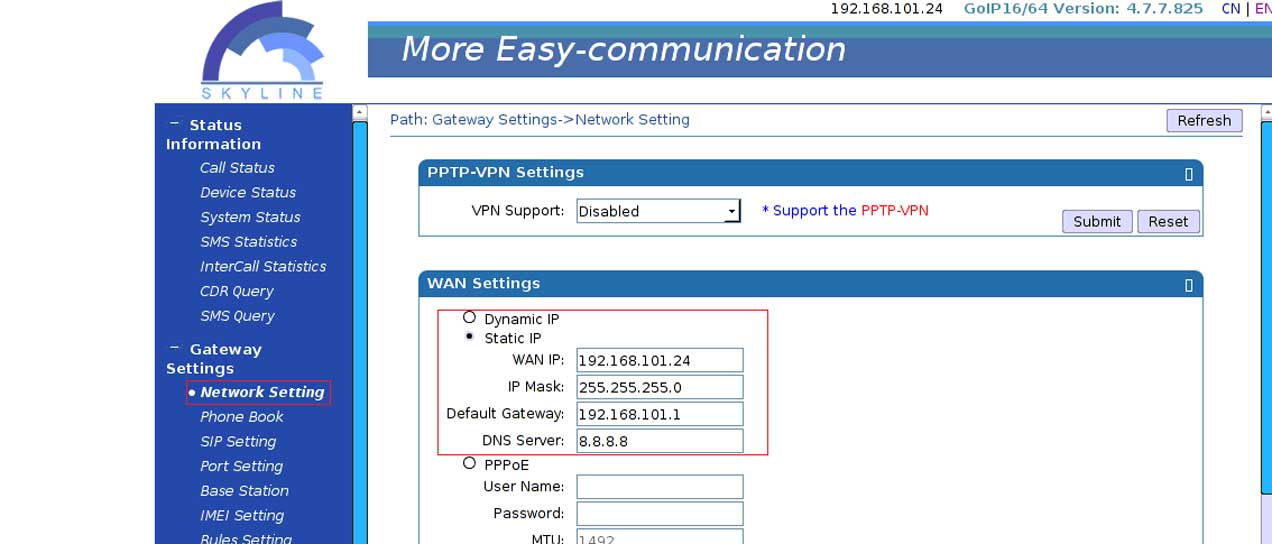
Figure-2: Skyline Gateway Network Setting
Step 2: In Skyline gateway Network page have to configure the basic Network Configuration. For this you have to know the default IP of your bandwidth optimizer. Set the Static IP of the gateway on the same series of the solution
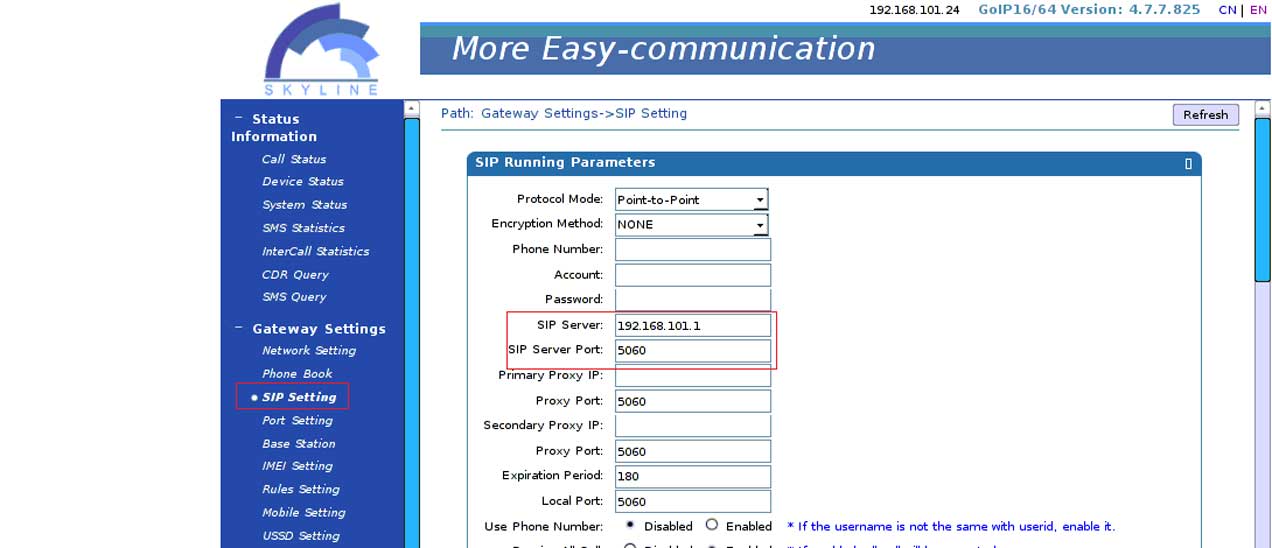
Figure-3: Skyline Gateway SIP Setting
Step 3: Skyline Gateway SIP Configuration you have to pair with default IP of bandwidth optimizer with its sip port
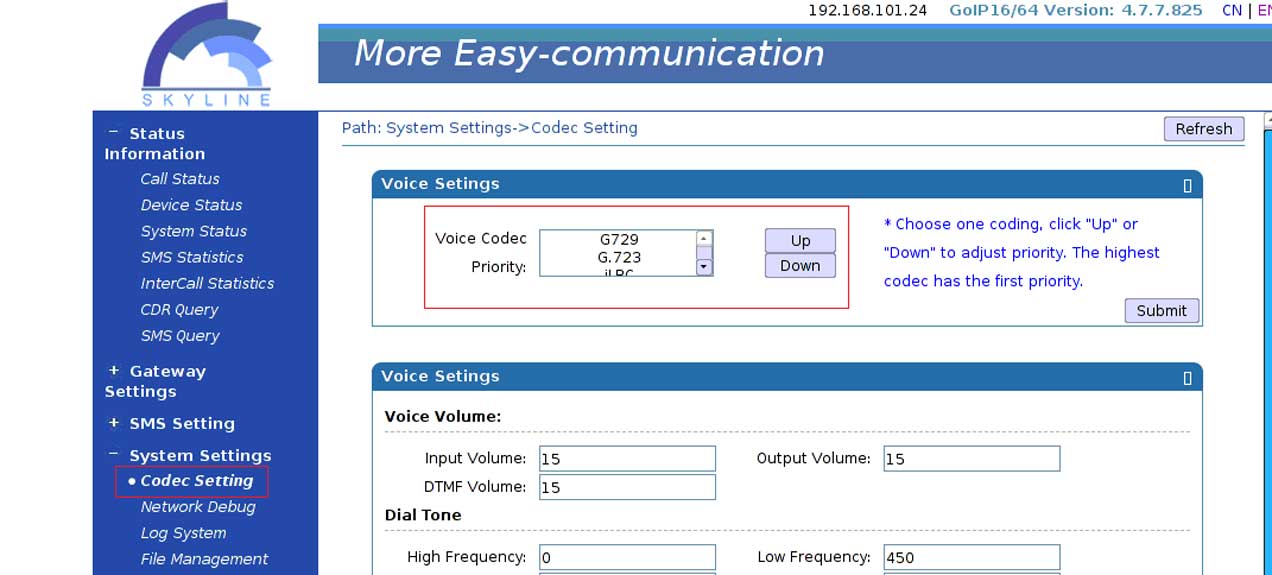
Figure-4: Skyline Gateway Codec Setting
Step 4: skyline gateway Codec setting is configured with your codec priority. G729, G723 will be at the Frist priority and PCMA and PCMU will be at last priority. You can change your Priority at your will
